Saturday, 22 July 2017

OAAH Beta Test, The Ballad of Green Gumption. Pushing the limits-

The Ballad of Lt “Green Gumption”

They came on 'ard those greenies with a loud “Walloo”

They tumbled our artillery then our poor Colonel too

The last one eyed our company and came on To Do

Stood Lt Gumption proud, “I'll 'ave 'im” to our “Go Too”

Out steps he, one, two a grenade-oh bowls straight and true

Bowled t' greenie a googly to our “Howzat” an' “Got You”

Our Royal Engineers wicket we showed 'em what a to do!


We got sidetracked, so I decided to do this one out-of-sequence. That's my excuse and I'm sticking to it.

I note one of the other playtesters has gone as far as American Wars of Independence – with a flying canoe! This one goes into what used to be called Science Fantasy, but is realistically Colonial as well.

The scenery is my very, very old Purbek Terrain. The trench is embellished with a model of the Space 1999 Moonbase. Been used for everything from 2mm ironclads up.

The sides are very small. I could have easily embellished this game more:
A lurking monster in the ruins
A flank march by one side
Local villagers joining one side.

Second outing for both these sides:
Green Martians.
Infantry Giant Level 2 Q4 A4 D6 Shoot2, Resilient, Ambusher 8x 37 =298
Leader add Sub General
Cavalry Giant Level 4 (Includes big mount) Shoot1, Tough, Ambusher 6x 48 = 288
Leader adds General.
Artillery Giant 2, Artillery Level2, Slow, Ambusher 2x 39 = 78
Total 644

Royal Engineers
Command Vehicle Q3 A3 D8 Artillery L3 (gatling gun) General, Tough, 3 extra lives @ 111
Tankette contraption Q4 A3 D8Artillery L3,Tough, 3 extra lives @ 84
Charabang Q4 A2 D8,Tough, @ 31 carrying:
Infantry Q4 A2 D4, Shoot3, Drilled 8 x 16 = 128 making a total of 159. 3 of these = 477.
Total 672.

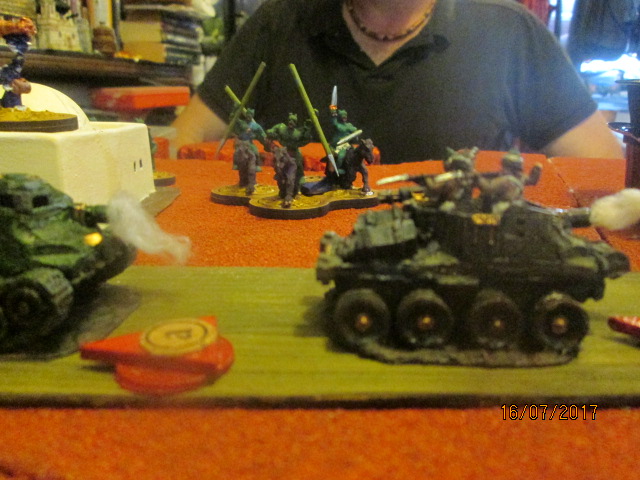
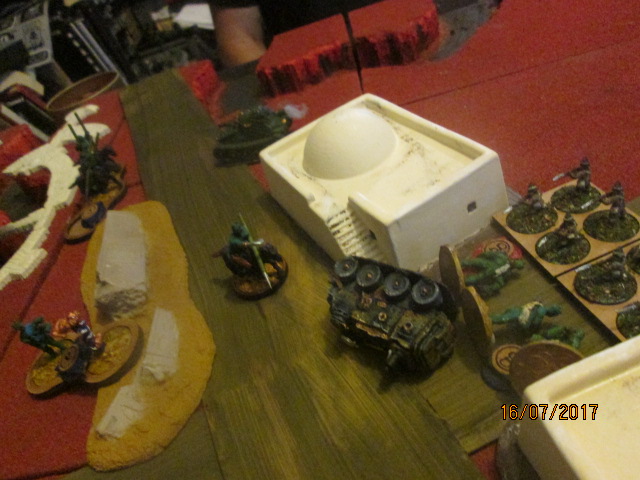
The Game. The premise is simple. The convoy has to pass through the village to get over the dry canal. The green Martians are ambushing them. Each game took us about an hour, 'im would say it should take 20 minutes. If part of a campaign we could have got to a reasonable conclusion in 30.

Game 1 I took the Brits, lined 'em up with Tankette in front just entering the village (ready for the ambush to be sprung) command car behind followed by the charabangs.


Seemed sensible to give the Martians the initiative. Naturally Tony started with the artillery- which failed. I used reactions to get my tankette into position and blew it away, leaving Tony the initiative. Out comes his flank cavalry cavalry, but my command car shot 'em to bits.


Now his other cavalry charged my tankette, taking one casualty but destroying it by hitting it on the flank. It may be hard, but it's still artillery. They plunge on, taking 2 lives of the command car by shooting. Then they mashed it, losing another. 


 Then the last remaining one charged my line. As detailed above. The infantry charged my line, but were shot to bits. That had reduced the Greenies numbers below viable. I was lined up, they were lined up and no-one is going forward so the green's going home.


Game 2 I take the Martians. Tony changes the order, putting a charabang in lead. He hastily dismounts his infantry across the road.


My cavalry gets chased by the tankette all round the houses, but my infantry and infantry leader takes on his command car and wins!


I managed to take out the lead charabang with my second artillery (again, the one on the building got stomped) but his infantry destroyed my other cavalry. I managed to get my surviving infantry close to his infantry but could do no more than threaten.


Thoughts:
Level 1 artillery would represent a sniper or magic enhanced weapon or even a booby trap.
Boats and airships have their specific cost, war-wagons need a cost. About 10-15 would seem right.
Don't put your artillery on buildings.
At this skirmish level the very close shooting range seems wrong. I'm wondering the effect of doubling the area size would work?
Oh for a couple of not-triceratops with howdahs or artillery-.


Emergency supplies being rushed to the front


Wednesday, 12 July 2017

OAAH Beta Test 2 - Medieval Japanese

Welcome, we bid you welcome!  To our second beta-test of Ganesha's Of Armies And Hordes.
I'm not going big, I'm going large. And Japanese – that made you gasp, didn't it!

I'm happy with the 120mm/ 1/4 of my 9" tiles areas for 15mm.

Just to recap- Q= quality, roll on/above to activate on 1-3 dice.  A=attack  (D6+Attack (or shoot ) +- to beat-) D=defence .


The baddies. Had to change what I did last week, but I think I've got some wotsits in the thingy. I've also worked out how to get the official spreadsheet to work! Although there's a few that decide not to-.

Bakemono goblins Q4 A3 D4 Devastating charge @ 13 x 16 = 278
Bakemono goblins Q4 A2 D4 Shoot 2 @ 14 x 16 = 294
Samurai Bakemono Q4 A3 D6 @ 19 x 8 = 144
Skeleton Q4 A2 D5 Undead, Slow @ ?
Skeleton archers Q4 A1 D5 Shoot 1 @?
Tengu Q3 A3 D5 Fly, Devastating charge @ 23 x 4 = 92
Centepedes & spider Q4 A3 D7 Resilient, Poison @ 29 x 4 = 116
Spiders Q4 A2 D5, Poison @14 x 6 =84
Kirin Q3 A4 D7 Shoot 3, Fast, Flying @44
Naga Q4 A5 D7 Giant level 2 Swamp walk @ 47 x2= 94
Nekomata* Q3 A5 D6 Fast, Sub general, Beast lord, Necromancer, extra 2 lives * ?
Baron Greenbacku Q3 A2 D6, General extra 2 lives

Total about 1,550

The goodies, almost normal--
Samurai cavalry Q3 A2 D6, Mounted, Fast, Shoot 3 @ 33 x 12 = 396
Samurai foot Q4 A3 D6 @ 19 x 16 = 304
Samurai archers Q4 A1 D6 Shoot 3 @ 12 x 24 = 192
Follower archers Q4 A1 D4 Shoot 2 @ 12 x 10 = 120
Follower Q4 A3 D4 @ 11 x 16 = 171
Monks Q4 A3 D5 Devastating charge @ 16 x 16 = 256
Peasant hordes Q5 A1 D2 ? X 32

Shugenja Q3 A2 D6 extra 2 lives, slow
undead
Alter terrain
Rain arrows

Dragon Q3 A4 D7, extra 2 lives, Fly, Monster L3 @ 93
General Q3 A2 D6 General, Fast, Shoot 3, extra 2 lives @ 65
Total about 1,550


The Game. I'm aware that many of the readers are new, not familiar with Ganesha games, used to YougoIgo.

First off, if you're used to kings of war, dragon rampant – this game is fast, the one below took 3 hours, and this is our second game so some discussion. What you don't do is go make a drink, update facebook or whatever during your opponents turn. You may do more than your opponent and wrestle away the initiative at the next dice roll.

Quick summary. I took the goblins. The objective was not defined, but I'd set up my left as a ruined border post protecting an important river crossing and crossroads. I'd added marshy ground on my flank.
I got the initiative and tried to move up, soon regretting giving skellies slow-. Tony used my reactions then his actions to box me in. He won the race (despite having further to go) to the central hill and I had to take it. On his right his archers mashed my small spiders and wiped out my archers, then withdrew into the ruins and thumped my Naga.


Note tactical use of jaffa cakes on the flank


My right finally got into contact and came off worse.


My Kirin and Tengu gained the heights, (they were my anti-dragon defence) the former got 3 activations and leaped upon Tony's general, taking 1 life in the shooting phase then they killed each other in combat!


The Samurai archers are the survivors of the battle for the hill.  Note the reversed pointer, indicating that they are still disordered.  As the Kirin got 3 activations, none of Tony's forces were able to interfere.


Tony went back, lost the monks and one group of peasants off-table. He then rallied, coming back strong with his horse archers and I melted.

Now let's look at how some of the units faired:
Dragon. Tony set 'im up on the steep hill, sensible as flying. But, despite being a “3” went “FU” to every activation. Every one. Go figure.


Shugenja. Didn't move until after the general's fall, got into position but that's all-.


Size 16 units and similar units: You run into the rule of averages, the odds are both are going to melt away. Don't make for interesting play. Expect to lose your unit. See what I try next week.

Horse Archers. These were the stars. Tony was impressed at the was the rules allow them to act as their 12c counterparts: “Shooting and Running Away If the acting unit still has actions available or has the Skirmishers trait, after shooting it may use one action to move out of the area. This hit and run tactic is not allowed if any unit in the area is faster than the shooting unit.”

Vs Tengu Down swoops my Tengu into the gap in front of the hill, 2 success 1 fail. Tony uses the fail (reaction before my action) to move in a cavalry unit (always best to hit a devastating charge unit) who shoot- and they're all dead. Done. Bang. Ouch.


(Vs) Centipedes. These were my star. They charged up a steep hill into the teeth of Tony's samurai archers. But their resilience (a saving throw) saves them- they kill 4, sends them flying. They then descend to the plane and attack the horse archers from behind, killing one and sending them packing. A second cavalry unit comes up and kills 3, sending the survivor into the ruins to lurk-.


Nekomata* A form of Bakemono goblin cat that can summon fire. Said to raise & control skeletons, Yes, it's the wrong figure, no, I don't care-.  I didn't use this one right, but it did manage to resurrect one dead Samurai who lasted- not long.