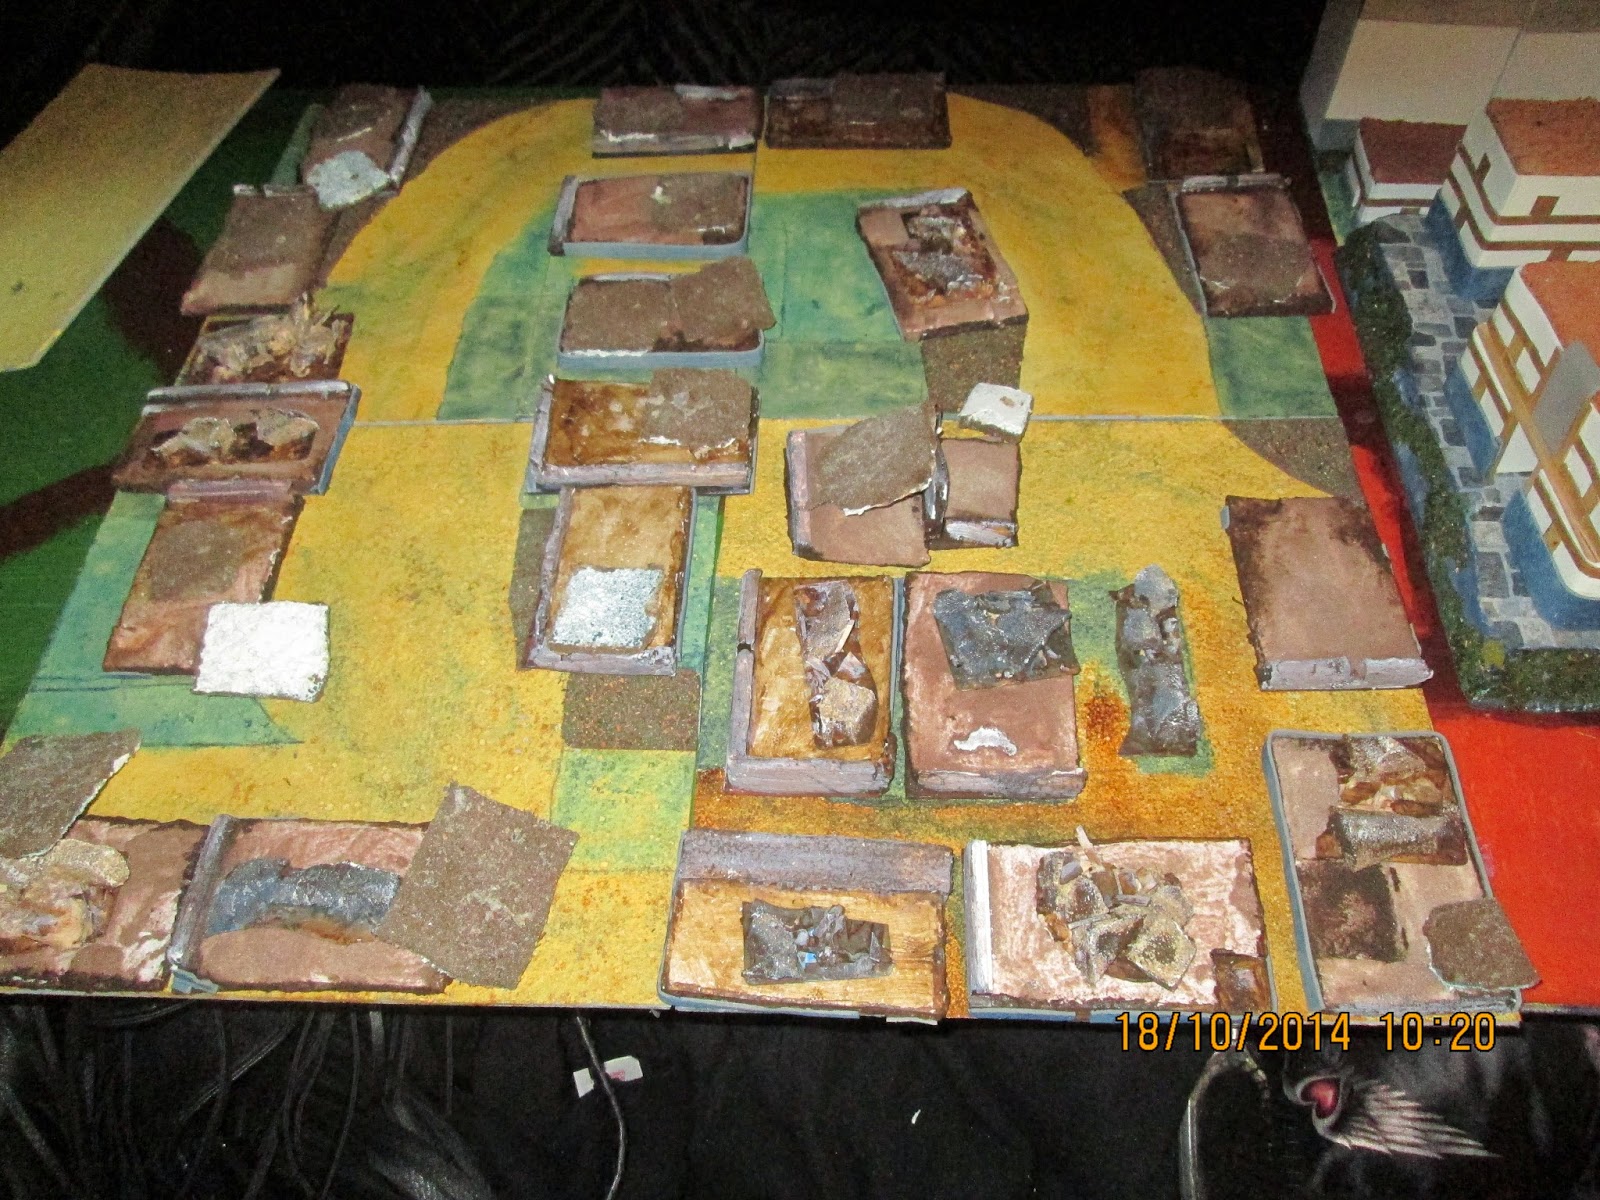
An Easy Troy, a cheap Troy, a
transportable Troy.
I've wanted one for some time. First,
there's OGAM, then Song of Shadows and Dust
http://www.ganeshagames.net/product_info.php?cPath=1_14&products_id=240 Plus, an end-of-table wall or even
street fighting for Song of Spear and Shield would not go amiss,
either. The ruins will create the Athens that fought against amazons
and centaurs in mythic times.
http://www.sacred-texts.com/wmn/ama/ama03.htm
Ruins, archaeologists for the use of.
Lost city in middle of jungle. Can I find a “She” in 15mm? Lost
colony, Stargate.
Plus, why should only modern cities
suffer the ravages of nasty big monsters? Mos Isley if I change to
adobe buildings.
Sometimes I think I'm a genius, prone
to flashes of pure inspiration. Others I think “what an idiot”,
something stares you in the face until the little light comes on. As
covered before, the buildings in the area influenced by the Minoan
are remarkably similar. Even the Romans didn't go this far. A
standard of living not beaten in the West until the industrial
revolution and beyond. The (Minoan) royal palace had indoor
plumbing, baths and toilets that would have made Queen Victoria not
amused with envy.
So I need X number of buildings of
similar size, each with a flat roof. I'm in the kitchen holding a
piece of foam with an interesting top. Light goes on. But I'm busy
for the next few days! You could use a block of wood or balsa*.
Neither of these materials work for me, so the cost and weight
criterion would be exceeded, leading to a wailing, gnashing of (own)
teeth and diverse alarums. Card or foam core would work, but would
be a fraction of the strength.
This project proved a real learning
curve*, so I hope some of you find this of benefit. Everything takes
drying time and/or smells, so planning is advisable. Hunched over
bits of foam then realising you've used ¾ of a tube of glue will
give me an 'eadache. You appreciate them splitting atoms with copper
chisels and bronze mallets 15 hours a day with never a tea break. I
had planned a short article on my thoughts regarding Troy and the
Trojan war because some things just don't add up.
The criterion:
Minimum 2ft square town with half the
table covered in buildings and at least two roads crossing the
terrain. Rather than have a crossroads, I want a central block the
roads go around. The city wall must reach across 2ft and have a
gate. Be usable on both sides. I'm not bothered about tiles lining
up, I live in Poole and there's not a straight “here to there” in
the whole town.
That's 4 full tiles, 2 half's minimum.
25 (ish) Standard buildings, which includes a few to “double deck”.
Same in ruins as OGAM also requires each building to be
“rubbleable”, a destroyed version to be available. Gods have the
same effect as a good artillery barrage, while normal infantry can
only do superficial damage. I need the “slightly bashed” to the
“scraped clean”.
Each main road must be wide enough to
accommodate 4 infantry abreast, which is about double what I'd do for
a normal road, but never mind. I use my Warbases bases and go
“broom brooom” to make sure it will fit. If I'd bother to do a
more regular close order basing I could have thinner roads. I “jink”
the roads to get a more natural feel and create interesting spaces
for figures to dodge into.
Here is my first 1/3. Not complete,
lacking the detailed parts but enough there to start gaming, which is
purpose!
There needs to be features, nooks and
crannies to allow for skirmish gaming. Market stalls, a pub, public
loo and construction sites help. I also want to do an extra raised
“des res” area with high rise buildings on one tile, stairs or
ramp up, central courtyard. The ability to do a running or linear
table will help design better games. I like the idea of “us and
them” each side of the gate.
General rules
Must be light enough to be carried, and
be able to fit into a collapsible plastic crate. (As it happens,
this construction method makes for buildings that will survive a drop
kick.)
Construction time and cost must be
relevant to the use.
Further from the centre of the action,
the less detail required.
 Buildings
. I dip the scourer top
into a mix of PVA and raw sienna or raw umber hobby paint, scrape
then dip into fine sand. This needs to be left for a couple of days
to dry. The rest of the build uses EV/funky/hobby foam and
cardboard.

The lower stone wall is made from a
sheet of dark grey foam scoured in thin lines, turned then “stippled”
to produce a brickwork effect. I like the blue colour from the book
so I get the sheet wet then apply a thin wash of indigo ink before
lightly stippling. As usual, this will take time to dry.
Construction is done with UHU glue. For
speed I pin the parts on.
The outer coating would be better in 4
wall-sections, if you've got the time. I tried it with some wall
sections but gave up. I tried two parts to no benefit. By a stroke
of luck, the circumference works out to just over the length of an A4
sheet. I cut to 30mm depth then attach to body as high as possible.
Doing one side at a time works. Precut as much as you can and leave
to “de stress”, cut excess rather than stretch. Don't rush, with
two flexible materials you must be careful not to add tension. This
leaves a small gap at bottom, but the stone cladding will cover that,
which is added after the doors are cut out and a thin card (I was so
lucky with the colour) door added. Next a 5mm strip of same card was
added at door height. Then the bottom strip, making sure it's level.
I use a small rawlplug box as a leveller. Last 10mm square windows
are added. I originally planned using coffee stirrers as the wood
strip, but the curved edges this method produces left them proud at
the corners.
Adobe buildings are even simpler. A
spread of no-more-nails or ghesso would give the rough look. I would
raise the roof parapet 10mm and add a brown foam roof. Cocktail
sticks will make my market stalls. Insert all the way through for
that distinctive feature.
 City outer wall
sections are made the
same way. Adding layers gives depth rather than a boring box. It
may not be correct, but looks good. The top section on or off? I
decide to make solid and to make the battlements out of double layer
of light grey foam, one added to the outside then the inner added as
a gap filler. Each wall section is made separately as per original
method then glued together. Thin foam layers need to be added.
Probably the originals had them, to allow for settling (this is an
earthquake zone) and expansion/contraction.
Base tile. There's several ways of
doing this:
solid blocks of building glued on the
base
individual or blocks of buildings plus
separate road sections
a textured base that the building
either fits on or in.
I had intended to do “in”, as in my
other city bases, but a test try to mount tree bases changed my
method to “On”. I used a grey “yoga mat” from the 99p shop
(UK) which has a textured under-surface. We are talking high quality
here. This is attached to the sticky side of vinyl floor tiles using
a layer of PVA. Warning, cheap foam can shrink when drying, so cut
proud. Base layer of paint was a tester pot of near ochre. The
greyish colour of the foam peeks through giving a nice blend with the
blue/grey building base. Small garden patches were brown foam with
flock added with PVA as if doing a figure base. Once dry, I used a
thin wash of Daler Rowney burnt umber ink over the road. On market
stall plots I added indigo ink to the mix. Building plots had a few
drops of black added. This works very well, more like doing
watercolours than anything I've done before. The remnants were
spread over the road and worked in with fingers. In this picture the
brighter yellow has been preped for the second wall section but not
inked.


Smaller special areas can be added to
narrow the roads and give depth. Market stalls are ideal, “you're
supposed to haggle!”
Here is my first batch again, held in
one hand.

That's it for now. Everything else I'm
doing uses the same materials and techniques above or in previous
articles. One last plug, these are The Scene's trees. I had got
them to do stunted trees in shell areas or dead trees in Hades. I
was so impressed I bought more, then they hang around-. I'll put
some foam shrubbery on some, watch this space.
Costs
Plastic crate £2
Vinyl tiles £3.25
UHU glue £3 (other solvent brands
are available)
PVA £1
No more nails £1 (rubbled buildings.)
Paint £1
Ink 50p
EV foam £14.95 (A4, 5 dark grey, 1
brown, 15 white, 3 mixed for rubble bases)

“Yoga mat” £1
Pan scourers £9
£35.70 about £7 per square foot.
* This video is the best I've found on this approach to scenery, particularly in balsa -
https://www.youtube.com/watch?v=hhHJ4zEKDZY