Beta test Song of Sword
and Shield Medieval Japanese
Let me walk you through the trial
version of the rules, particularly the ones we overlooked during our
chariots trials.
The force builder is already up, so you
can play with that.
http://www.ganeshagames.net/extra_info_pages.php?pages_id=17
I'm hoping your already used to the
Ganesha way of doing things? This, of course, is evolving.
Three SOP's may be different than your
used to:
Activation a
unit or individual self-activates rather than as a group-activation
by a leader. Each unit is presumed to have an officer.
Reaction.
If you've played Battlesworn or OGAM (recommended!) you'll be used to
reactions. Each unit and single figure uses up to 3 dice per
activation. Any failed dice can be used by the other side as
reaction per one unit (who has not already reacted). Using the 2
fails as reaction then activating same unit as the start of your turn
can be very powerful, and a good use of a tactical reserve.
In the Beta rules reaction isn't used
but there are free actions in certain circumstances as you will have
seen in our chariots games. One we didn't use is that instead of
contacting-without-combat (as with most of the rest) the attacker
stops 1short away, at the units zone of control, at that time missile
armed troops can attempt to shoot them.
Combat result. Each combat is
1:1 rather than the abstract method used in OGAM, but a defeat of 1
over armour and its out. That means that an unarmoured or lightly
armoured unit can melt away under longbows or against double handed
weapons (that can do a+2 strike for 2 activations).
The rules are designed to pit diverse
units against each other, the good old “What If” that so many
other rules seem to despise. Watch out for those Airfix type plastic
soldiers, each can supply a side (or 2) don't worry about force
balance, because the rules don't.
The
M figure is morale,
see below. Ignore for now.
Side 1
Armoured “Abbot” (single figure)
Q3 C3, Armoured 3, Leader, Sword @ 84
(M*8+6=14)
up to 18 warrior monks with
naginata's** C4, C2, impetus, 2 handed weapon @ 30
(M3)
up 16 peasants with bamboo spears Q5,
C1 (untrained civilians with some enthusiasm)
Q5, C1, spear @ 8
(M1)
(Impetus gives a +1Q in first
bound only)
Side 2 I
want a more sedate, armoured side as a strong contrast. I can choose
from:
Leader, Q3 C3, mounted regular horse,
longbow, expert horse archer, sword @ 120
(M12+8=20)
Cavalry Q3 C3, mounted regular horse,
longbow, expert horse archer, sword @ 90
(M9)
(I have dismounts identified by same
letter bead, painting, available with sword or bow)
Standard bearer Q4 C2 armour 2, sword,
standard @47
(M4+3=7)***
8 Samurai archers Q3 C2,armour 3
longbow, good shot, @66
(M6)
8 Samurai sword Q3 C2 armour 3 2 hand
weapon, @48
(M5)
8 follower bow Q4 C2 armour 2, longbow,
sword @39
(M4)
8 follower naginata. Q4 C2 armour 2, 2
handed weapon @32
(M3)
This makes the Samurai marginally
better controlled and equipped than their lesser cousins.
(these forces are mostly from Eurika
Miniatures and come in 8 infantry/4 cavalry)
Unit size is maximum of 1/3 of
figure count.
Regular Leader(s)
have an effect of +1 Q at long. If they are lost the force becomes
shaken and a Q roll is required, loss will route the unit****.
Irregular Leader(s)
lead from the front***** and the +1Q is only effective if the leader
is as close to the enemy as his troops. Loss of a leader is a big M
loss, but no Q roll required.
Side 1 option 1 (Game
1)
Armoured Abbot Q3 C3, Armoured 3,
Leader, Sword @ 84
Warrior monks with naginata's Q4, C2,
impetus, 2 handed weapon 14 @ 30 =420
Peasants with bamboo spears Q5, C1,
spear 16 @ 8 = 128
Total 632 (Morale
14+42+16= 62. Shaken at 20, broken at 31)
31 figures gives a maximum of 10, 2
units of 7 monks, 2 units of 8 peasants, 1 individual.
Side 1 option 2 (Game
2 ) we can bump up the monks but lose the impetus
Armoured Abbot Q3 C3, Armoured 3,
Leader, Sword @ 84
Monks Q4 C2 armour 2, 2 handed weapon
17 @ 32 = 544
Total 628 (Morale
14+51=65 shaken at 22, broken at 32)
18 figures = units of 6, so that's 3
units of 6, one including the Abbot.
Side 2 option 1 (Game
2)
Leader, single figure, Q3 C3, mounted
regular horse, longbow, expert horse archer, sword @ 120
Cavalry Q3 C3, mounted regular horse,
longbow, expert horse archer, sword 3 @ 90 = 270
Standard bearer Q4 C2 armour 2, sword,
standard @ 47*
Samurai sword Q3 C2 armour 3, 2 hand
weapon, 2 @ 48 = 96
Follower naginata. Q4 C2 armour 2, 2
handed weapon 3 @ 32 = 96
Total 629
(Morale 20+27+7+10+9= 73, shaken 24, broken 36)
10 figures in total, so 3 units of 3
(Samurai and Standard) and 1 individual figure.
Side 2 option 2 (Game
1) if
we lose the cavalry we can have:
Leader, single figure, Q3 C3, mounted
regular horse, longbow, expert horse archer, sword @ 120
Samurai archers Q3 C2,armour 3
longbow, good shot, 4 @ 66 = 264
Standard bearer Q4 C2 armour 2, sword,
standard @ 47*
Samurai sword Q3 C2 armour 3, 2 hand
weapon, 2 @ 48 = 96
Follower naginata. Q4 C2 armour 2, 2
handed weapon 3 @ 32 = 96
Total 623 (Morale 20+24+7+10+9= 70,
shaken 23, broken 35)
(if force 1 option1 loses a peasant,
624) 13 figures, = units of 4, so the units above stand.

Morale* Calculating
Morale Value
To
calculate a model’s morale value, do the following:
1)
take its point value, divide it by ten, round up;
2)
add +3 if the figure is a subcommander or standard bearer;
3)
add +6 if the figure is the overall Leader, or a personality
4)
subtract -1 if the figure is Stubborn and/or Light Infantry;
5)
halve the total if the figure is part of a open order unit;
ignore
all of the above and use a value of zero if the figure is Expendable.
When
a side passes its Shaken limit, it opponent gets +1 Q over the next
full bound. Doesn't sound much but if you're already losing it can be
a hammer blow.
If
your going to play a lot it's worth doing a spreadsheet that will
work out your force and you print n play. Or you can make a quick
reference sheet like this one to keep track of losses.
Terrain
There were several vicious fights
between monks and samurai, often in built up areas. An open area
with buildings around the fringe stops the Samurai from simply
keeping their distance and shooting the monks to bits. Inspiration
came from the superb illustration of Yoshizaki Gobo in Osprey's
Japanese Fortified Temples and Monasteries. I could add a bridge,
barricades and pavices (well no, I haven't got them, more for the
“todo” list) or consider ambush. In this game the terrain is
selected by the forces, not the other way around. It evolved in the
planning as a 650 points game (we use a 27” table & 15mm,
roughly the same points value as one of our larger chariot games).
The points maximum per size of table depends on type. The more Long
moves/shooting you have, the bigger the area needed. Despite the
small size of the Samurai force the cavalry are hemmed in and
longbows are almost instantly in range. I was after a courtyard type
encounter so this felt like what I wanted to achieve.
Having whittled down the possibilities,
the rules now provide some character to each force.
From the National Rules selection,
these are from amongst the “less sexy” ones.
Favourable
Omens for the Monks
Once
per game, the player may reroll any one die on a Combat, Quality or
Morale roll. The result of
the
reroll is final. This rule may not be used in combination with any
other rerolls.
Tony used this once, and got a 1 both times. Fickle things, the gods of small dice.
Efficient
for the Samurai
The
player of an Efficient force may ignore one turnover once per game.
The failed activation rolls
are
still lost, but do not cause a turnover and the player may go on
activating his other
figures.
Use this ability once per game, during your bound, right after
rolling a turnover.
Note
also this rule, which in a previous game I used to defeat Achilles.
Redress
the Lines
Once
per game, the highest ranking leader in the force may order his
troops to redress the lines.
This
may be attempted ONLY during the player’s bound.
Any
units attempting to Redress the Lines make a Morale roll on one to
three dice (player's choice) versus a Quality of 2, regardless of the
actual Quality of the figures. Per every success rolled, all the
models get to perform one movement action away from the enemy and
towards the friendly baseline.
No
contact or ranged attack may be performed during this withdrawal. If
the player rolls more failures than successes on the morale roll,
then the movement turns into a rout and the unit is removed from the
game.
To
use this order, at least one leader must be on the tabletop.
A
Shaken force may use a Redress the Line order.

Standard**
Give
this rule to a standard bearer. If a standard is part of a close
order unit, one model in that unit
may
reroll one melee die per bound. The result of the reroll is final,
even if worse than the previous
result.
During a Redress the Lines order, units may gather around the
standard as if it were a leader.
Two
handed Weapon***
This
generic category includes most two handed mauls, large swords,
including naginata and polearms excluding thrusting pikes and spears.
Such weapons require two hands to use (the model may not use a
shield). Models with two-handed weapons may spend TWO actions on a
power attack, having a total of +2 on the attack.
This
may seem a lot of bother, but you can see that I have a variety of
units “on the shelf” that can be dusted off at need. Preparation
pays, we find we can spend all of 10 minutes agreeing and assembling
a game. We often play scenarios with little regard to points.
The
Games. Tony chose the 1st
Monk option and I took the second Samurai. I was attacker
and got the initiative.
 |
| Starting positions |
My
first round was boring, but Tony's impetus and uber-dice rolls saw
him leap towards my throat! Round 2 resulted in one movement-. I got
a good round of shooting in that knocked off some peasants. My
(sword) Samurai got good results so I sent them against Tony's right
peasants, locking the 2 units. Tony got good, risking moving his
Abbott up to “pull” his troops forward, (making max use of his
+1****) sending his monks into my Samurai which killed 2, leaving 1
to face all of his spearmen. Now his other monks chased my general
and piled into the flank of my archers. One loss put me into Shaken.

 Now
it was my turn to gamble. My General (Isimo) rode out to within a
long of Tony's and wooosh, one dead leader. Tony's left wing
collapsed and routed. Now do these troops count towards morale? If
so, he was broken. We counted both as shaken and ignored the +1.
Tony didn't need it, his spear got 3 activations and moved down to
threaten my archers rear while the monks moved to the front of my
archers, taking the pain of reaction shots, killing 3.
Now
it was my turn to gamble. My General (Isimo) rode out to within a
long of Tony's and wooosh, one dead leader. Tony's left wing
collapsed and routed. Now do these troops count towards morale? If
so, he was broken. We counted both as shaken and ignored the +1.
Tony didn't need it, his spear got 3 activations and moved down to
threaten my archers rear while the monks moved to the front of my
archers, taking the pain of reaction shots, killing 3.
 I
got my followers into his spear. Nasty attacking spear and I traded
1:1, which was a loss and that was my turn. Tony attempted to launch
his monks at my archers – and total failure. That one dice roll
won me the game, sort of!
I
got my followers into his spear. Nasty attacking spear and I traded
1:1, which was a loss and that was my turn. Tony attempted to launch
his monks at my archers – and total failure. That one dice roll
won me the game, sort of!
Errors
1 + 2. The monks with initiative should cost 36, not 32 – I
think what I did originally was no armour, which would have made 30.
 Loss
of (all) leaders means individual rather than group activations, so
game one would have ended sooner with the same result.
Loss
of (all) leaders means individual rather than group activations, so
game one would have ended sooner with the same result.
 Game
2 This time the Samurai (me) was defender. I placed one
impenetrable wood. I also gained initiative.
Game
2 This time the Samurai (me) was defender. I placed one
impenetrable wood. I also gained initiative.
I
had a plan that nearly worked. I started by spreading my deployment
too wide, the idea was to try and get local equality in one place
while using my archers to tear apart another unit.
Moving
my cav to my left, I forced Tony to pivot. I had hoped to break his
force up, but it didn't happen, he got good rolls and kept all his
units within the leaders influence throughout the game.
When you
have Samurai there is only one thing you can do with them. I sent
them against the front of Tony's leader, the idea was to back them up
with my followers on the flank so that I'd have equal numbers but the
slight edge in quality. Didn't happen, so my chaps died when his
other unit pivots into it. My followers finally get into the fight
and kill two.
On the other flank my archers took a heavy toll,
killing one unit. I'm on the brink of being shaken and Tony is
steeling himself up engage my Samurai. Now we had a Japanese stand
off. If I bring my archers in close, they are going to get chased.
If I stand off, I risk Tony's leader coming up on my flank.
 But now
we are both shaken but Tony's leader's unit is down to half. He
fails an activation and I decide to take a gamble, withdrawing my
Samurai and sending my General Isimo into combat against Tony's
leader. Then my archers take on his infantry, only killing one in 6,
and the General held his own. Then 7 and he rolled two fails. That
was the break Tony needed and he killed the General! He sent his
monks screaming at my Samurai, who broke except one brave hero who
got cut to pieces.
But now
we are both shaken but Tony's leader's unit is down to half. He
fails an activation and I decide to take a gamble, withdrawing my
Samurai and sending my General Isimo into combat against Tony's
leader. Then my archers take on his infantry, only killing one in 6,
and the General held his own. Then 7 and he rolled two fails. That
was the break Tony needed and he killed the General! He sent his
monks screaming at my Samurai, who broke except one brave hero who
got cut to pieces.
 Error
3. I should have played my “efficient” here to ignore the
failure and used the one initiative and free disengage for cavalry to
get out of dodge. I might have been able to shoot Tony to a break,
or he might have been able to charge me and slice up the horses.
Error
3. I should have played my “efficient” here to ignore the
failure and used the one initiative and free disengage for cavalry to
get out of dodge. I might have been able to shoot Tony to a break,
or he might have been able to charge me and slice up the horses.
So
I got the result I expected, except I lost-. Quality can win over
quantity sometimes. Not always!
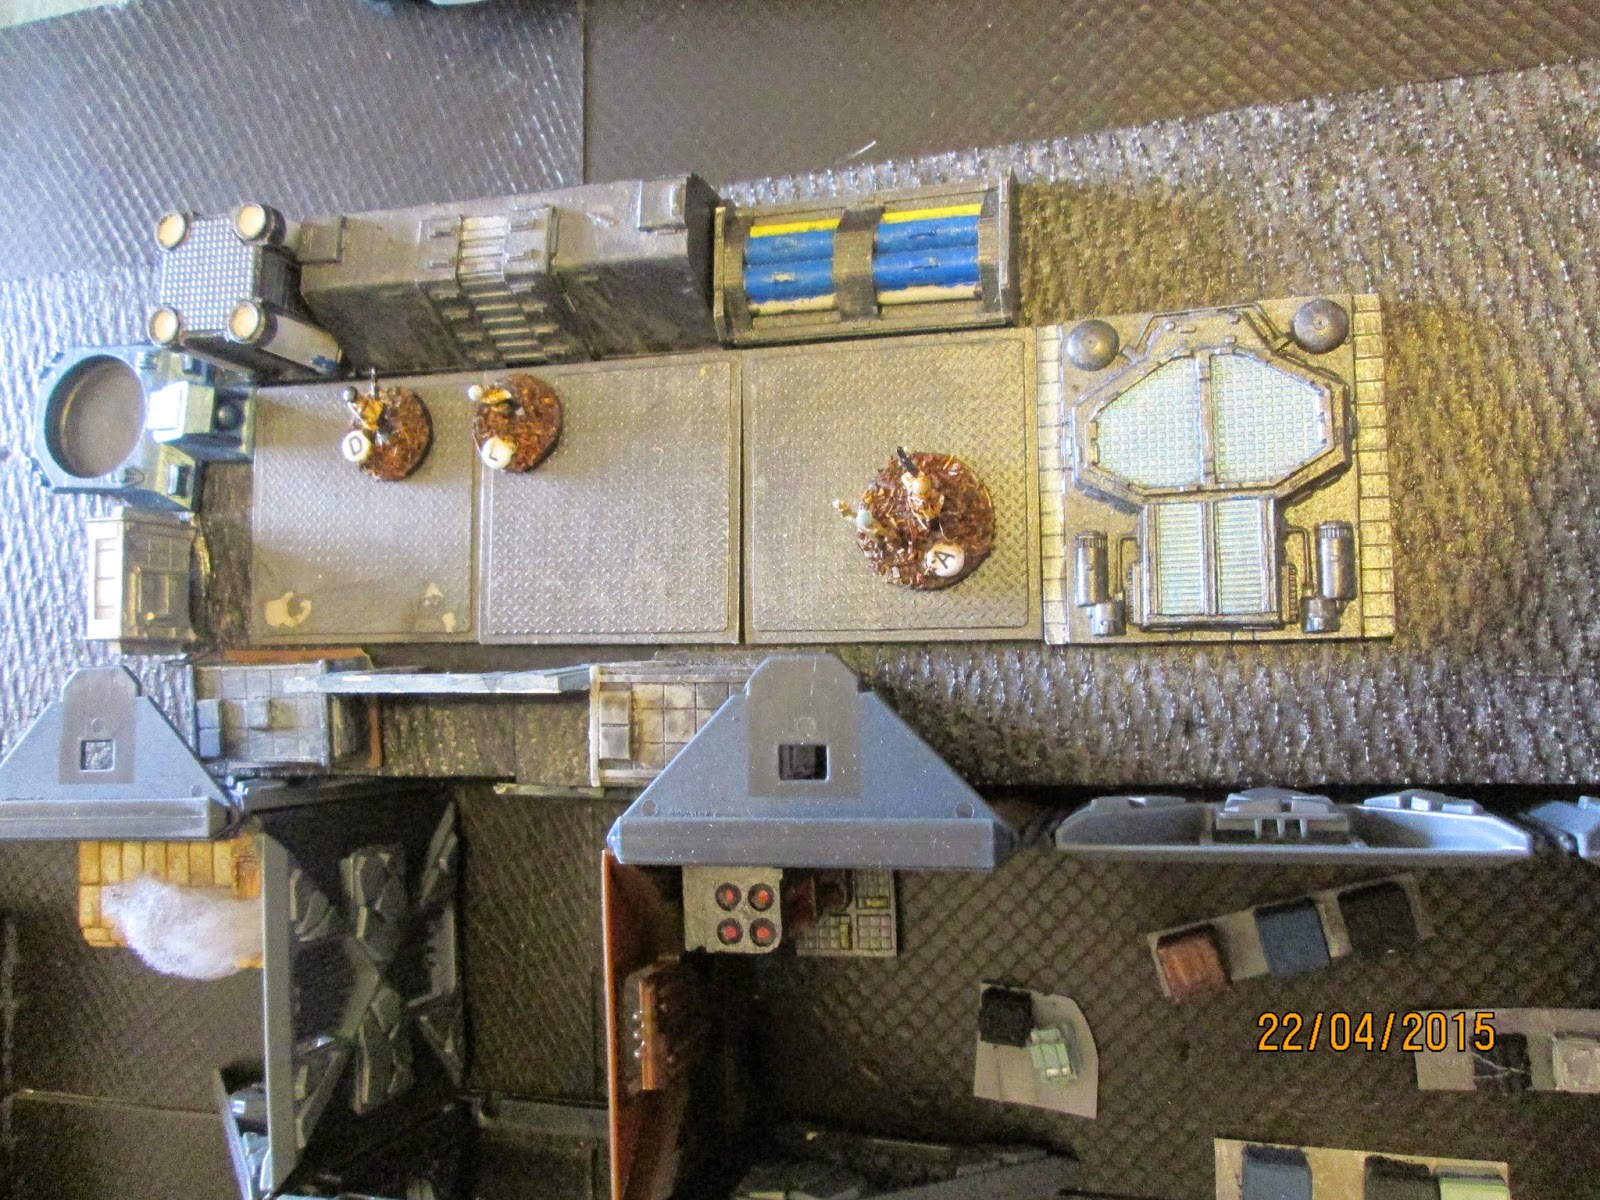
 The RPG Space 1899 offers
plenty of scope for skirmish games*. This one is set on a tramp
steamer plying the aether betwixt Mars, Earth and Venus. Shaped like
the proverbial brick, these vessels use reflected sunlight to heat a
boiler, then evict superheated steam for thrust. This example has
four cargo holds. The rearward two (top picture) are full of bulk cargo. Our
intrepid Dominar and his party occupy the third, (the lorry) which is equipped
for carrying live cargo in the most basic conditions. The fourth (duck) has
a mixed cargo with a small group** being carried as supercargo in
even worse quarters.
The RPG Space 1899 offers
plenty of scope for skirmish games*. This one is set on a tramp
steamer plying the aether betwixt Mars, Earth and Venus. Shaped like
the proverbial brick, these vessels use reflected sunlight to heat a
boiler, then evict superheated steam for thrust. This example has
four cargo holds. The rearward two (top picture) are full of bulk cargo. Our
intrepid Dominar and his party occupy the third, (the lorry) which is equipped
for carrying live cargo in the most basic conditions. The fourth (duck) has
a mixed cargo with a small group** being carried as supercargo in
even worse quarters. 

 The crew raise the
alarm, the Dominar establishes contact then sent the girls into
action.
The crew raise the
alarm, the Dominar establishes contact then sent the girls into
action.